
Pavlova
Confession: This pavlova was the most frustrating recipe I’ve ever developed.
The recipe
Yield: 6–10 servings
Time: 2 hours, plus 3 hours cooling
Ingredients
Pavlova:
5 large egg whites (165 g), at room temperature
1 and ¼ c (260 g) superfine sugar
2 tsp (6 g) cornstarch
¼ tsp (2 g) cream of tartar
¼ tsp (2 g) salt
1 tsp (5 g) vanilla extract
Topping:
1 and ½ c (360 g) heavy cream
3 tbsp (40 g) sugar
1 and ½ tsp (7 g) vanilla
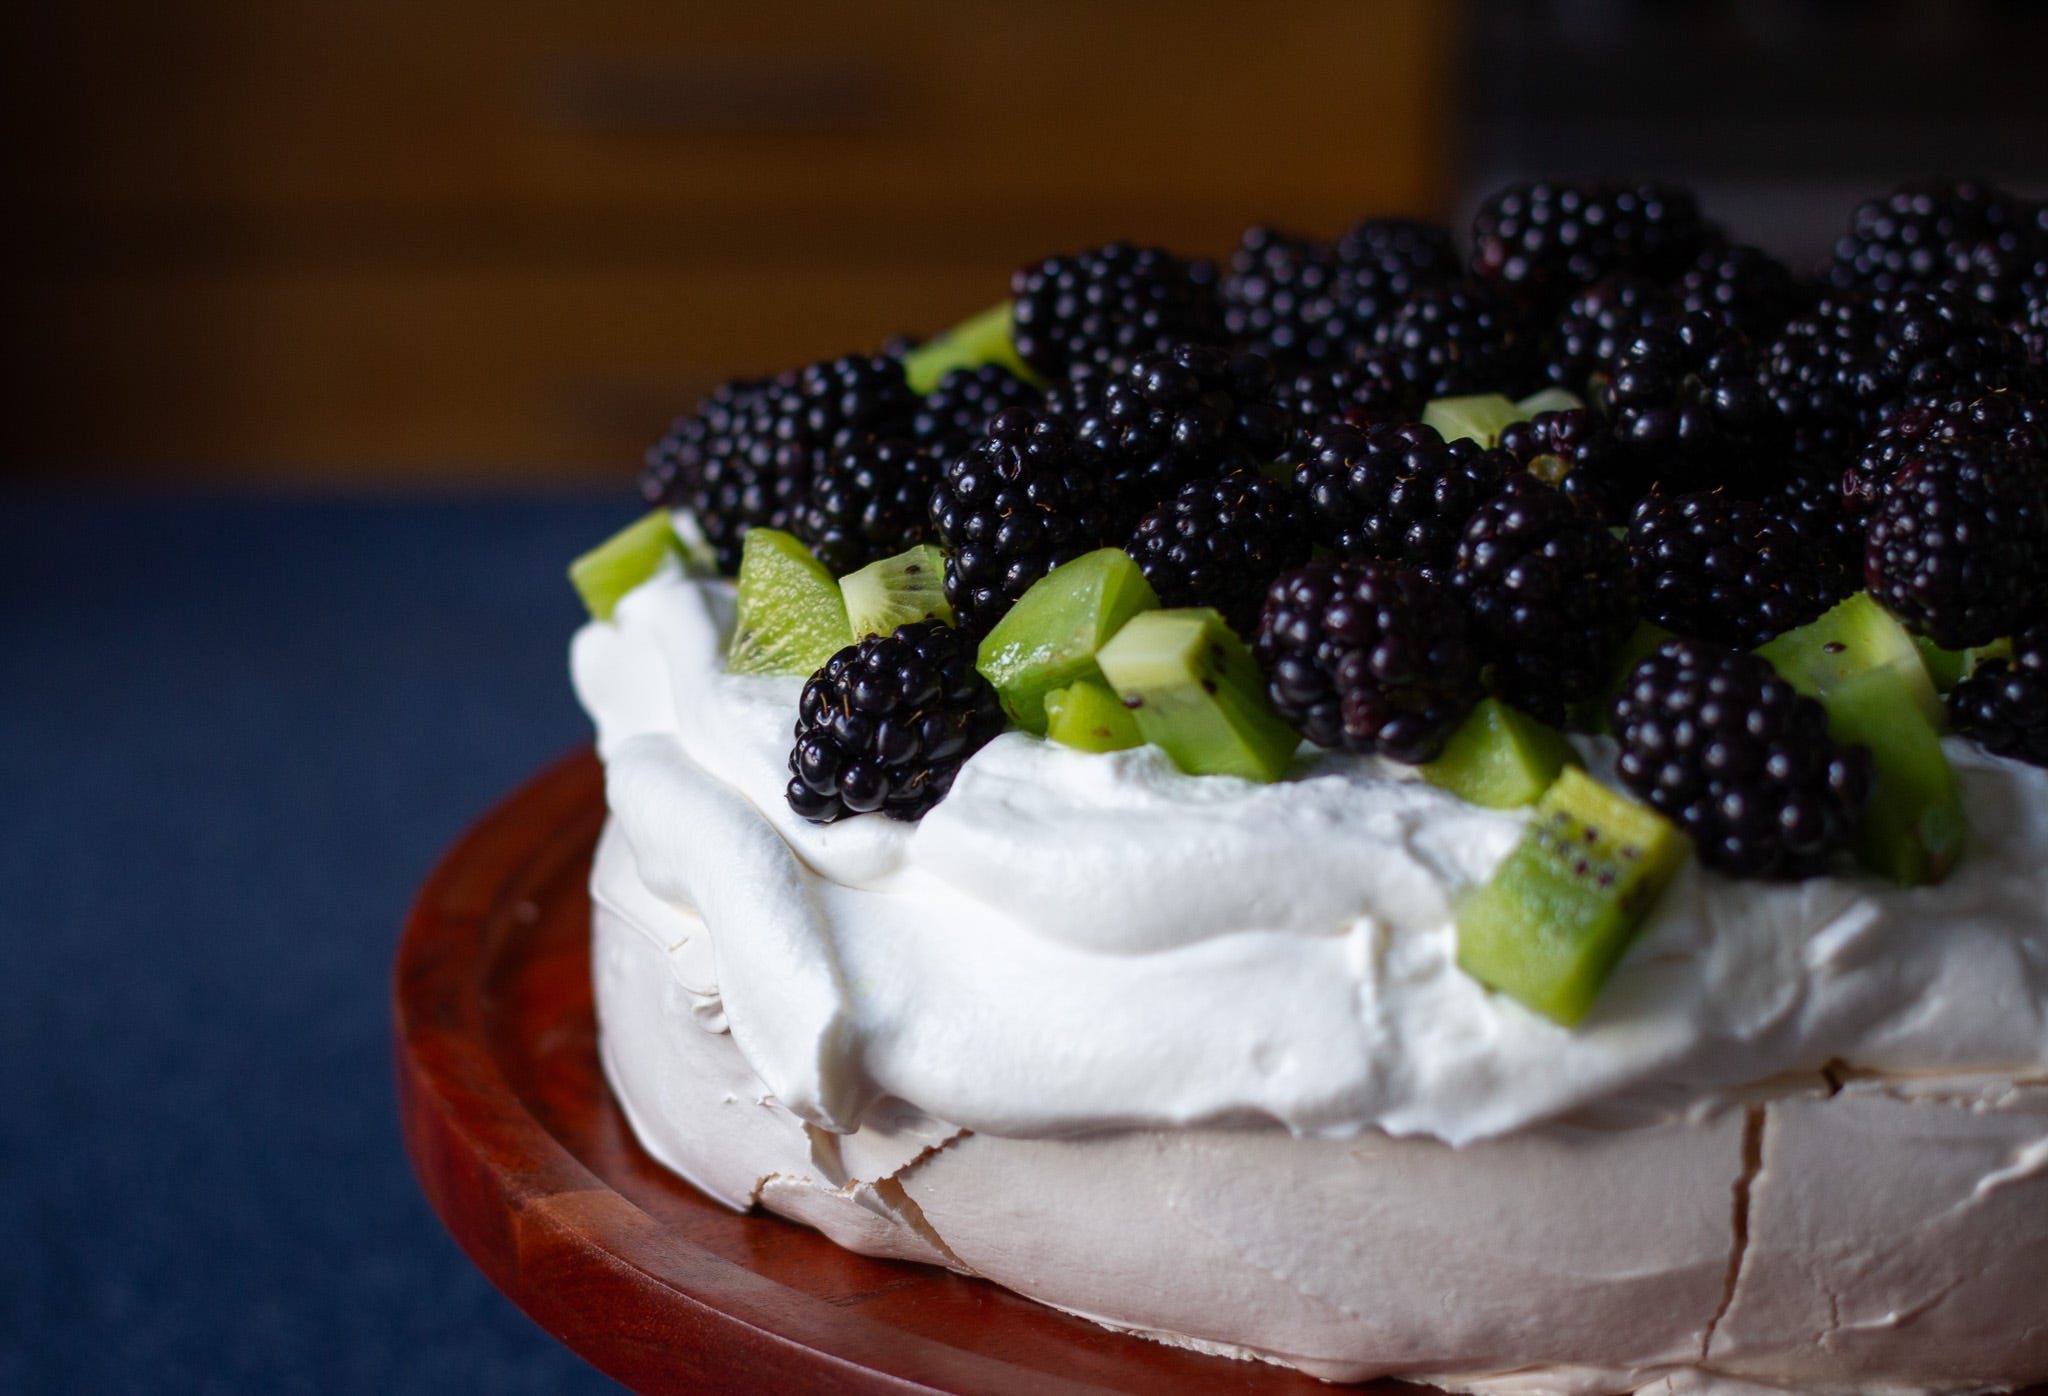
Fruit, washed and sliced (I used 10 oz blackberries and 3 kiwifruit)
Lemon curd (optional)
Instructions
Pavlova:
1. Preheat your oven to 250°F. Trace a 9-inch circle on a piece of parchment paper, then place it on a baking sheet, traced side facing down.
2. Mix together the sugar and cornstarch and set aside.
3. In a stand mixer fitted with the whisk attachment, beat the egg whites on low speed until broken up and bubbles begin to form on the surface.
4. Add the cream of tartar and salt and beat egg whites on medium-low speed until foamy.
5. Slowly add the sugar and cornstarch mixture to the egg whites. Do this by pouring a thin, steady stream of sugar into the egg whites while the mixer is running at medium-low speed. See the pictures for a reference.
6. When all the sugar is added and the egg whites are glossy and past the soft peak stage, increase the mixer speed to medium. Beat until they form stiff peaks.
7. Add the vanilla extract and beat again for a minute to incorporate it.
8. Spoon the mixture onto the parchment and spread it into a 9-inch round mound, using your traced circle as a guide. Make sure that there is a little dip in the top of the mound so the whipped cream and berries have somewhere to sit.
9. Bake the pavlova for 90 minutes. It is done when the edge feels firm and crisp to the touch.
10. Turn off the oven and let the pavlova cool in the oven with the door closed until ready to serve, a few hours to overnight.
Topping:
1. Place the cream, sugar, and vanilla in the bowl of a stand mixer and beat on medium speed just until the cream reaches stiff peaks.
2. Take the pavlova out of the oven and turn it upside down. Peel off the parchment and then place the pavlova right-side up on a serving plate. Top with the whipped cream, curd (if using), and fruit, then cut and serve immediately.
Notes and tips
The ratio of egg whites to sugar is important to form a pavlova’s crisp crust, so I recommend using a scale for this recipe.
Okay, look, I know that some of you are not going to listen to me about superfine sugar and are going to make this pavlova with regular granulated. Fine. I don’t condone it, but if you’re going to do it anyway, you can try to put the sugar in a food processor and pulse it until the granules get small but are not powder. (My food processor blades are dull, so this didn’t work for me.) And don’t expect pavlova perfection. The sugar probably won’t dissolve completely, but bake the meringue anyway after it reaches stiff peaks. Expect it to start weeping at some point, so try to make your pavlova a few hours before eating it instead of a day ahead of time.
You want your eggs to be at room temperature to help the sugar dissolve. If you forgot to get them out ahead of time like I always do, place your whole eggs, cold from the fridge, in a bowl of hot water for a few minutes, or crack the whites into a bowl and set that bowl in a pan of warm water.
Soft peak stage for meringue means the egg whites will form a little “mountain” when you lift the beater out of the meringue, and the top will flop over.
Firm peak stage means that the tops of the peaks stick straight up (for whipped cream) or only fall a tiny bit (for meringue) when you lift the beater up. (See the photo below for an example.)
Leaving the pavlova in the oven to cool keeps it from cracking as much because the gradual puts less stress on the meringue than placing it on a room temperature counter would. It also gives it a little bit longer to dry out the crunchy edges more, so don’t skip this step.
If the pavlova cracks, that’s fine. It probably will. That’s part of its imperfect charm.
The pavlova is delicate, so be careful when flipping it upside down and then right side up again. You may want to use a pan or a plate to help you do this.


The story
I knew I had a lot to learn about pavlova when I started this recipe. It’s not a dessert I grew up with; my mom didn’t bake many meringues. I had also tried and failed to perfect a pavlova for my husband’s birthday more than once, and I was determined to get it right. After all, pavlova hails from my husband’s homeland, New Zealand (don’t let Australians tell you differently; they’re jealous of New Zealand’s stunning mountains, mild climate, and wildlife that isn’t deadly, and their claim on pavlova is an attempt to make up for their country’s inferiority).
I did a lot of research before I began baking and started with the classic technique: mixer on medium-high, begin adding sugar at the soft peak stage, a spoonful at a time. I could see that my sugar hadn’t dissolved all the way when I put the meringue in the oven, and sure enough, the finished pavlova oozed liquid when I served it. Not appealing.
I tried a combination of powdered sugar and granulated, adding the sugar to the egg whites not long after they started whipping. I accidentally took this pavlova out of the oven before it was all the way cooled. On the drive to Bible study the inside of the carrier started steaming up. I yelped, gave my husband a panic attack, and whipped off the cover while I blasted the AC, holding the pavlova as close to the air vent as I could. But the outside still turned soggy before we arrived.
I thought the rainy weather during my first two attempts was most of the problem (humidity is a meringue’s worst enemy), so I waited until the sun was shining to try again. This time the pavlova cracked a lot and there were still sugar granules in my meringue.
Maybe I had my mixer speed too high. It could be whipping the egg whites faster than the sugar could dissolve. And what if I tried a smaller 8-inch round this time? Maybe a taller pavlova would crack less. The sugar did dissolve (finally!) and the pavlova barely cracked, but it took forever to finish baking. Three hours in the oven and still no crisp shell on the outside? Unacceptable.
And I wasn’t sure what to do next. This time, I had done everything right, and it still hadn’t turned out the way I wanted. I was expecting a bright white, perfectly intact, crisp and chewy pavlova, which this method should have delivered, meaning compromises had to be made, and I didn’t want to compromise. Other bakers didn’t seem to need to do so. Was I missing some secret? Was I cursed? Did meringue hate me? Fine. I hated meringue too. Whoever thought whipping air into egg whites, such a delicate process you can’t have a lick of fat in your mixing bowl, was a good idea? And who were those bloggers who claimed pavlova would be “so easy” to make! It was definitely not. And I had a huge pile of dishes piled on my counter that I refused to look at. It’s one thing to do the dishes when I’m making progress on a recipe and learning something from every attempt. It’s another when all I’ve done is dirtied half my pans for nothing whatsoever. So I got out my laptop and rage-watched YouTube how-to videos.
King Arthur’s pavlova video had failed me. Their sugar dissolved easily into the meringue, even while whipping on high speed. That hadn’t worked for me. Claire Saffitz had failed me. Her powdered sugar/granulated sugar combo just didn’t produce the crisp crust I had wanted on the outside. And I hadn’t baked my pavlova in a springform pan like she did. Maybe the pan had something to do with it. Sally’s Baking Recipes didn’t call for any salt in the meringue, which made it cloyingly sweet (I had tried a salt-free meringue on my first attempt—not again.) And Nigella Lawson baked her pavlova on a higher heat. I didn’t want a tan outside that was full of cracks. But there had to be something I could use from these videos. So I watched again. And noticed that everyone but Claire used superfine sugar.
Could sugar granule size really make that much of a difference? I knew superfine sugar had smaller crystals than regular. Could that be enough to make it dissolve easily into the egg whites? I hated to ask my readers to buy specialty ingredients. Especially ones that were expensive for no good reason. But I was so sick of whipping egg whites that I had enough patience left for only one more attempt. So I decided to give it a go. I was never going to make progress if I didn’t change anything. Well, the sugar dissolved—all of it—like a dream. When the pavlova finished baking, I was able to pick it off the parchment paper without it shattering on me (a miracle, truly), even though it did crack. I’d gotten the bake right, too, having given up a bright white color for a higher oven temperature, and when I gave it a firm tap to check for doneness, it seemed like I’d achieved the crisp outside I was after.
I smiled cautiously to myself as I got out my camera. I cut a slice, took some pictures, and when I tasted it, I knew. Soft middle, crisp edge, sweetness balanced by a hint of salt in the meringue and topped with deliciously tart, juicy fruit. I had achieved everything I’d wanted. The meringue rapidly softened under the whipped cream as the photo shoot dragged on, so my taste testers had a chewy shell by the time it got to them. The pavlova had been perfect only for me, and just for a moment. But I had finally, finally done it.
Housekeeping
I won’t have a recipe for you on May 29th, but I’ll be back on June 14th with brown sugar frosting—great if you want something special to go with the Perfect, Easy Vanilla Cake.
Spread the Snob
If you like this recipe, please recommend Confessions of a Cake Snob to someone you know! Follow me on Pinterest or Instagram for more ways to view and save the recipes. Please share this newsletter with a friend, comment on the website, or bake it and let me know how it went for you! Email me with comments, ideas, and suggestions at confessionsofacakesnob@substack.com.
Not sure how I found your blog but I love reading it, and I too married a Kiwi! I live here in NZ, and as a former Michigander, your cider doughnut recipe has me near tears with missing Fall😝I can’t wait to make it someday!! (my babies have tons of food sensitivities so I can only breastfeed and only eat like fourteen foods so maybe next fall I can try the doughnuts😍)