


Malted Almond Cake
I didn’t plan on making a layer cake. This one was going to be a simple sheet cake.
The recipe
Yield: one two-layer cake
Time: about 4 hours
Ingredients
Almond Crème Pâtissière:
2 egg yolks
⅛ c (15 g) cornstarch
1 ½ c (390 g) whole milk
½ c (110 g) sugar
¼ tsp salt
1 tsp almond extract
2 tbsp (30 g) salted butter
Almond Cake:
1 Duncan Hines Perfectly Moist Classic Yellow cake mix
¾ c (160 g) vegetable oil
4 eggs
1 c (260 g) whole milk
1 tsp vanilla extract
2 tsp almond extract
Malted Frosting:
1 c (220 g) sugar
1 c (260 g) whole milk
5 tbsp (50 g) flour
2 sticks (225 g) salted butter, room temperature
1 tsp vanilla extract
4 tbsp (45 g) malted milk powder
Almonds, for decorating (optional)
Malted milk powder, for decorating (optional)
Instructions
Crème Pâtissière:
1. Whisk together the egg yolks, cornstarch, and ½ c (130 g) milk in a bowl until well combined. Set aside.
2. Stir together the remaining 1 c (260 g) milk, sugar, salt, and almond extract in a small pot. Cook over medium-low heat, stirring gently, until it begins to simmer, 2-5 mins. Small bubbles should appear on the edges of the milk mixture when you stop stirring, and it should be steaming. Take the pot off the heat.
3. Ladle the hot milk mixture into the egg yolk mixture one spoonful at a time, whisking the eggs constantly. Once you’ve added half of the milk mixture, add the rest all at once, stirring to combine.
4. Cook the crème pâtissière over medium-low heat, stirring constantly, until it boils and thickens, about 5-8 mins. Pour it through a strainer into a heatproof bowl. Place a piece of plastic wrap directly on the surface of the crème pâtissière to keep it from forming a skin and place it in the refrigerator to chill.
Cake:
1. Preheat your oven to 350°F. Prep two 9-inch round cake pans by greasing the sides with butter and lining the bottoms with parchment paper. Use a little butter to stick the parchment to the bottom of the cake pan.
2. Place all the ingredients in the bowl of a stand mixer fitted with the whisk attachment. Beat on low speed until well combined. Stop and scrape down the sides and bottom of the bowl.
3. Beat on medium speed for 2 minutes, stopping once or twice to scrape down the bottom and sides of the bowl.
4. Pour the batter into the cake pans and bake them on the center rack of the oven for 18–22 minutes. They are done when a toothpick inserted into the center of the cake comes out with some moist but cooked crumbs clinging to it.
5. Leave the cakes to cool in their pans for 10 minutes, then run a knife along the edges of the pan and turn them out onto cooling racks lined with foil or parchment paper.
Frosting:
1. Combine the sugar, milk, and flour in a small saucepan. Whisking constantly, cook over medium-low heat until the mixture boils and begins to thicken, 5-10 mins. Let it boil until the mixture becomes thicker than pudding, about a minute, and then remove it from the heat.
2. Strain the mixture into a heatproof bowl, place a piece of saran wrap directly on top of the mixture to keep it from forming a skin, and cool it in the refrigerator until it reaches room temperature, about 30 minutes.
3. When the flour mixture is cool, beat the butter in a stand mixer fitted with the whisk attachment on high speed for about 3 minutes until light and fluffy.
4. Add the vanilla and beat again on medium speed until well incorporated.
5. Add the flour mixture to the butter mixture one spoonful at a time, beating on medium speed, ensuring each spoonful is fully incorporated before adding the next.
6. Sift 2 tablespoons of malt powder into the frosting and beat until fully incorporated. Repeat with the remaining 2 tablespoons of malt.
Assembly:
1. Once everything has completely cooled, place one cake layer upside down (flat side up) on your cake stand. Fill a frosting bag outfitted with a large round tip (I used Wilton tip #2A) with about ½ cup of frosting and pipe a ring of frosting around the edge of the cake, inset a little bit. This is a frosting dam and will hold the crème pâtissière in place. You may have to make the ring double height to hold in the filling.
2. Spoon the crème pâtissière on top of the cake, being sure it is not higher than the frosting dam.
3. Gently lay the second cake on top of the first one. For a flat top, place it upside down. For a domed top, place it right side up. I find domed tops a little easier to frost, so I recommend right side up.
4. Fill a bag fitted with a large round tip (I used Wilton #12) with about ¾ cup of frosting. Set aside.
5. Coat the cake with a very thin layer of frosting, a crumb coat, with an offset spatula. Chill the cake about 30 minutes until the frosting has set. It should no longer feel sticky to the touch, but more tacky instead.
6. Frost the top and sides of the cake with an offset spatula.
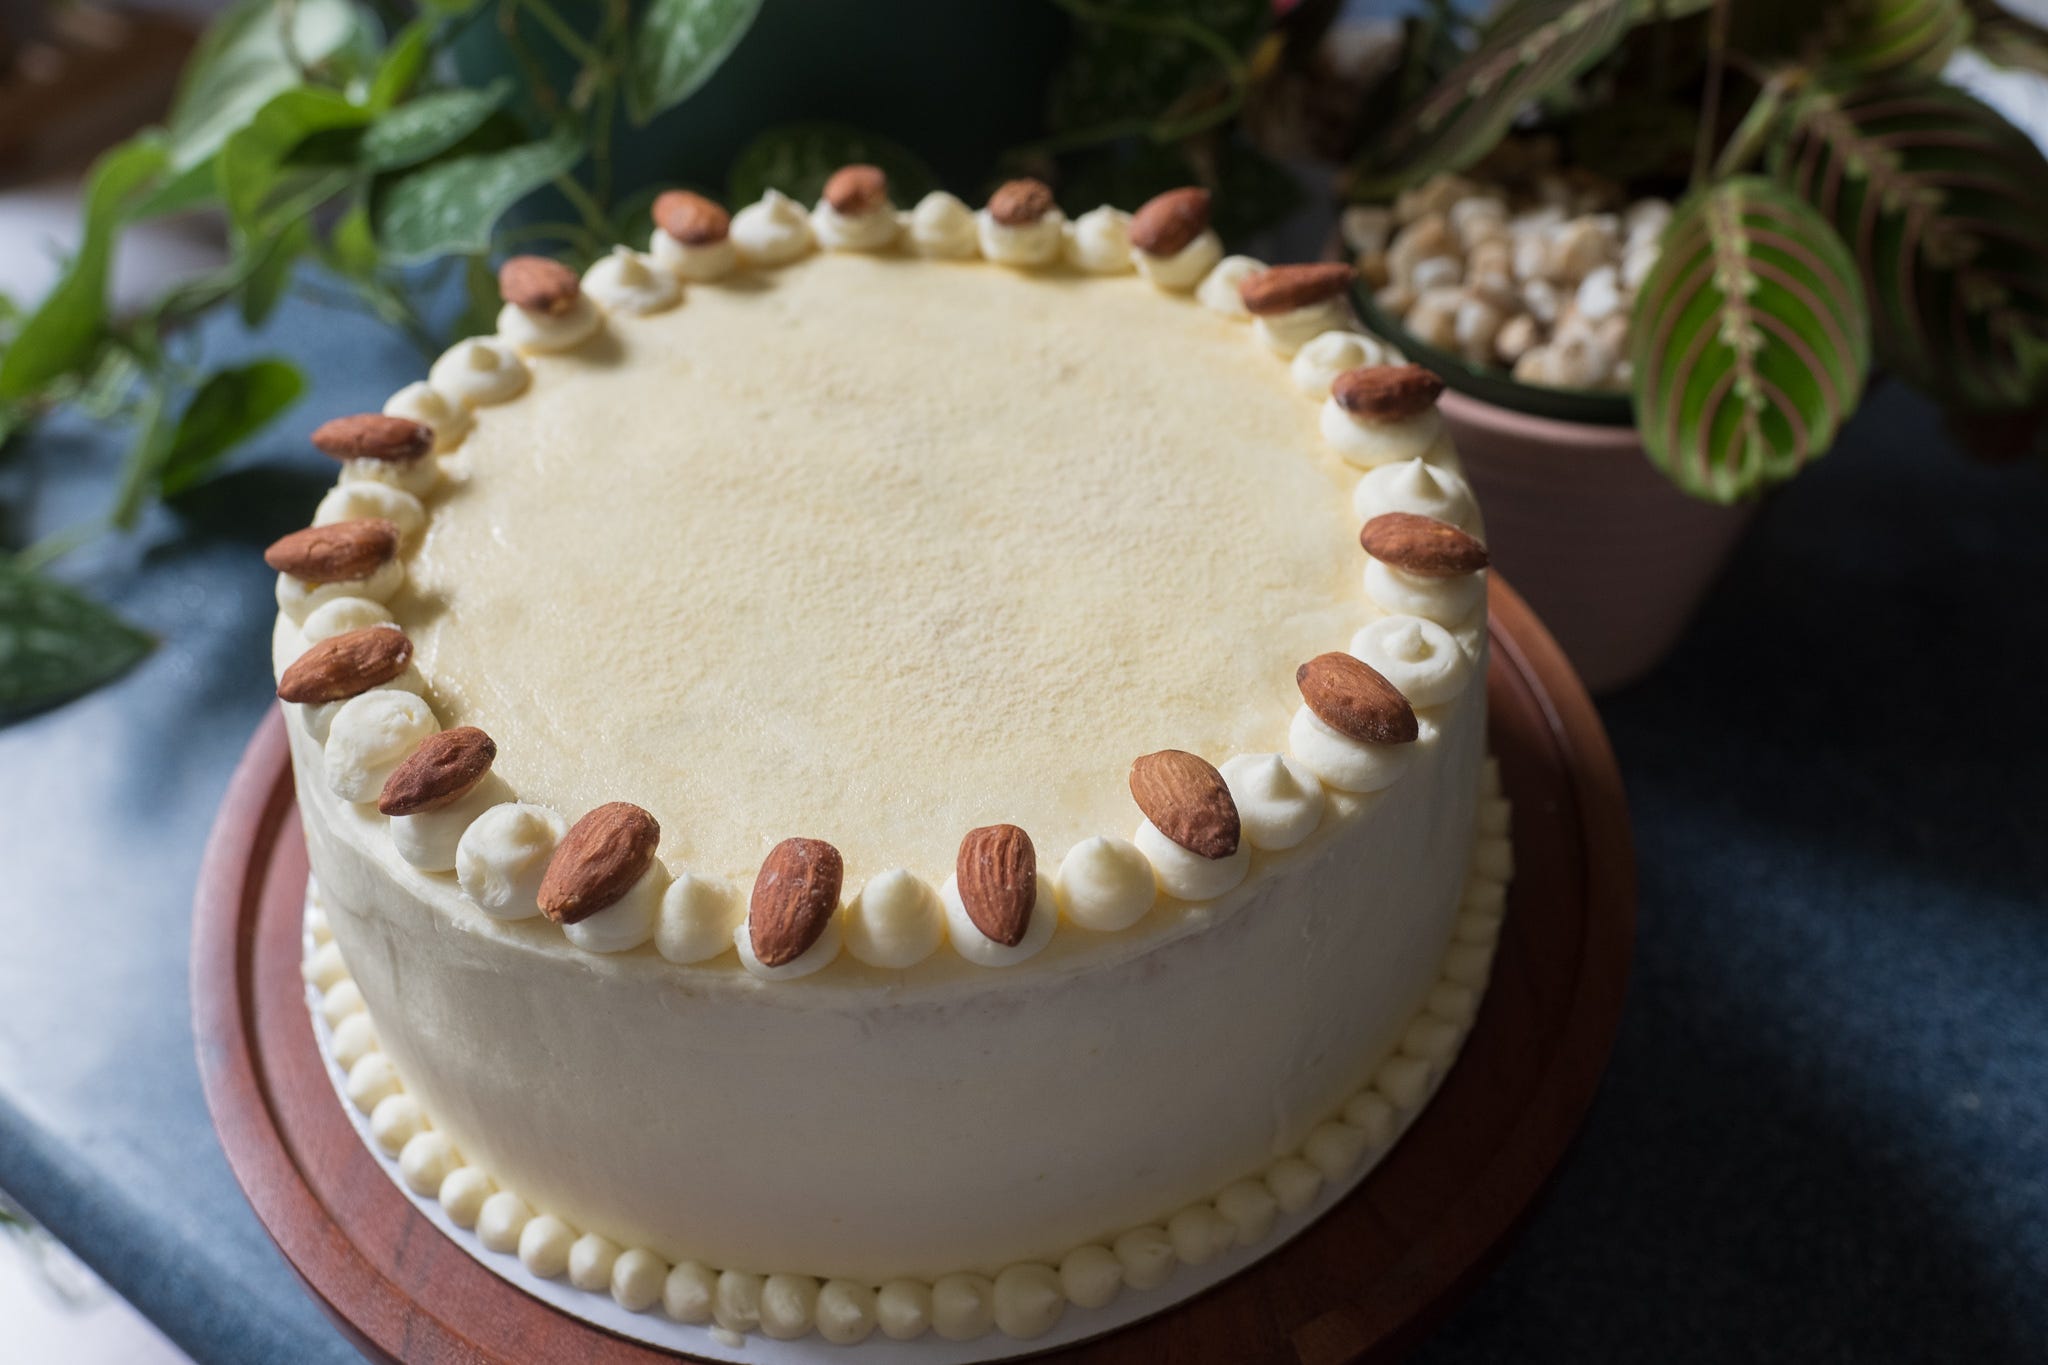
7. Pipe a border of large round frosting mounds on the top edge of the cake and small round frosting rounds on the bottom edge. If there is any extra frosting left after piping, squeeze it out and spread it on top of the cake. Top the little frosting mounds with almonds.
8. Store the cake in the fridge. Just before serving, use a sieve to dust the cake with malted milk powder. Cut slices while cold and let them warm up to room temperature (about 15 minutes) before enjoying. The frosting tastes better at room temperature because the butter in it hardens in the fridge.
Notes and tips
For more cake tips, check out The Cake Snob’s Guide to Better Cakes from my May 5 newsletter! I’ll recap the two most important tips here, though. Start checking your cake a few minutes before it’s done by sticking a toothpick in the center of it and take it out of the oven when a few moist, cooked crumbs cling to the toothpick. Contrary to conventional wisdom, the toothpick doesn’t need to come out clean. If you can, invest in a set of baking strips. These are little strips of reflective cloth that you soak in water and then fasten to the outside of your cake pans. They result in cakes that are taller, lighter in texture, and flat on top instead of domed. This is maybe the most impactful thing in getting a light, moist cake, aside from having a good recipe.
The key to getting the frosting to work is to make sure that both the butter and the cooked flour mixture are at the same temperature when you combine them. If you need to err on one side, it should be the ingredients being a little too cold. If you’re making this in the summer like I did, that means the butter should be cooler than room temp if your room is above 75°F. If the butter and the flour mixture seem not to be coming together fully and are still on the cooler side, just beat them for longer in the mixer and they’ll emulsify as they warm up together.
Make sure your flour mixture for the frosting is pretty thick. If it isn’t, the final frosting may not set fully, though the malt should offer you a little forgiveness since it can soak up some extra liquid. You want to boil the mixture until it’s thicker than pudding. Don’t be worried if this takes longer than the directions say. Everyone’s stovetop is different.
To keep your crème pâtissière as silky as possible, cook it over a low heat and remove it as soon as it thickens up enough. The low heat lengthens the narrow window between the crème pâtissière being cooked enough to set and overcooking and getting lumpy. That said, a few lumps aren’t a big deal. My last batch was a little lumpy, but no one could tell when I put it in the middle of the cake.
You’ll want to work quickly to frost the cake if you’re doing it in a hot kitchen, or at least give the filling and crumb coat a good half hour to chill in the fridge before finishing frosting the cake. This frosting isn’t as tolerant of heat as buttercream is because it has a higher ratio of butter in it.
I ask you to sift the malt into your frosting because the first time I made this frosting, I didn’t do it and it turned out grainy.
The story
I wanted to give you a recipe that wasn’t as time-consuming as the layer cakes I’ve developed so far. I wanted a simpler introduction that would feel more doable for bakers who haven’t attempted many cakes before or who are scared of getting it wrong. And that cake is coming, I promise, but it’s not this one. I would be sorry, but I thought that almond crème pâtissière would be sooo delicious in this cake, and I was right. This one, like many of my recipes, isn’t exactly simple, but it is delicious.
I owe it to a delicious milkshake that my friend Catherine made me a few months ago when I was over her house for lunch. She asked if I wanted almond, malt, or a few other flavors in it, and I chose both almond and malt. It was so good, and because I’m always thinking about cake, my brain naturally wondered what would happen if I tried to make an almond and malt cake.
The first one had an almond pudding in the middle, an almond-flavored frosting, and malt-flavored cake. It was good, but it needed improvement: the cake it didn’t taste like malt and was a little bit drier than I liked, the almond flavor made the pudding taste almost savory because it wasn’t very sweet, and the frosting tasted a little too strongly of almond extract. Turns out you can use a lot of vanilla extract in something without it tasting too strong, but the same is not true for other flavors. So I tried again. More sugar fixed the pudding, a little less almond fixed the frosting, but double the amount of malt powder, along with a little extra milk to compensate still didn’t taste like malt. So I tried again, adding a whopping eight tablespoons of malt to a single layer of cake, and when it still didn’t taste like malt after I baked it, I knew I needed to try something else. I puzzled over it and realized that malt usually goes into things that aren’t cooked, like milkshakes, and that in order to taste it in a large shake, you needed a lot of powder—a whole three tablespoons in a single serving. So I tried switching the cake to an almond flavor, keeping the filling the same, and adding malt to a vanilla frosting, a tablespoon at a time, until I could taste it, and that’s the recipe you have in front of you.
P.S. The amazing Christina Keddie took some exceptionally beautiful photos, so here are more of them to enjoy! I swear, the cake looks nice in person, but not this nice. It feels like that moment when you see your own wedding pictures and think how great you look and you can’t believe it’s you, except I look at my cake and can’t believe I baked something that looks so pretty and professional.


Spread the Snob
If you like this recipe, please recommend Confessions of a Cake Snob to someone you know! Also feel free to share this newsletter with a friend, comment on the website, or bake it and let me know how it went for you! Email me with comments, things you’d like to see, and suggestions at confessionsofacakesnob@substack.com. I’m excited to hear from you!
I’m generally not a fan of anything malted but if this is anything like the cake I got to try last week - it is PURE HEAVEN.